Working Area
The Working Area of the AVS Image Converter main window is used to adjust output image settings, as well as apply various effects and add text or image watermark to the added images. The Working Area looks different depending on the tab you select.
Working Area with Conversion Tab selected
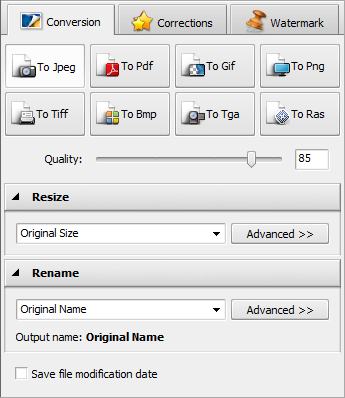
| Formats |
To Jpeg |
Use it to set JPEG as an output image format. Choosing this format you will be able to adjust the quality of your images using the slider below. |
| To Pdf |
Use it to set PDF as an output image format. Choosing this format you will be able to select the page format from the Page Format drop-down list below and set the output name in case you want to save your images in one document. |
| To Gif |
Use it to set GIF as an output image format. Choosing this format you will be able to create an animated GIF image, to set the output name and the frame duration in the settings area below. |
| To Png |
Use it to set PNG as an output image format. Choosing this format you will be able to create an animated PNG image, to set the output name and the frame duration in the settings area below. |
| To Tiff |
Use it to set TIFF as an output image format. Choosing this format you will be able to select the compression type from the drop-down lists below. |
| To Bmp |
Use it to set BMP as an output image format. |
| To Tga |
Use it to set TGA as an output image format. |
| To Ras |
Use it to set RAS as an output image format. |
| Resize |
Preset |
Use it to select one of the available Presets to resize the images added to the AVS Image Converter program. |
| Advanced |
Use it to open the panel with additional options to adjust your image size. Visit the Resizing Images section to learn more about how to do that. |
| Rename |
Preset |
Use it to select one of the available Presets to rename the images added to the AVS Image Converter program. |
| Advanced |
Use it to open the panel with additional renaming options. Visit the Renaming Images section to learn more about how to do that. |
| Output Name |
Displays the selected output image name. |
| Other |
Save file modification date |
Use it to preserve the original modification date while converting. If this option is selected the last modification date of the source files will be preserved for the resulting images. If this option is unchecked the modification date will change to the conversion date. |
Working Area with Corrections Tab selected
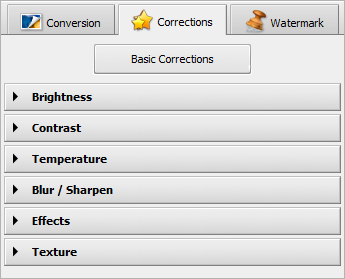
Basic Corrections
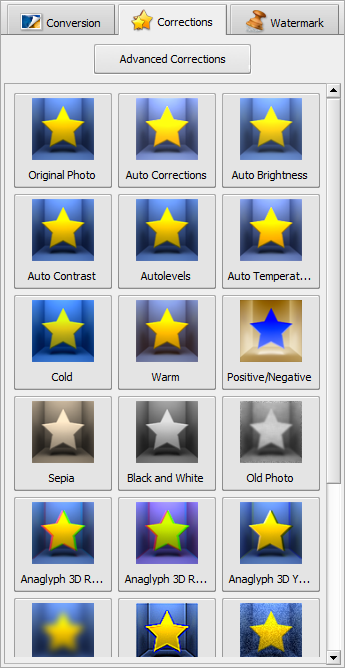
| Advanced Corrections |
Use it to switch to the advanced correction mode. |
| Original Photo |
Use it to restore the original images. |
| Auto Corrections |
Use it to automatically adjust brightness and contrast of your images. |
| Auto Brightness |
Use it to automatically adjust brightness of your images. |
| Auto Contrast |
Use it to automatically adjust contrast of your images. |
| Auto Levels |
Use it to automatically correct tonal values of your images. |
| Auto Temperature |
Use it to automatically adjust the color temperature of your images. |
| Cold |
Use it to make a photo look cold. |
| Worm |
Use it to make a photo look worm. |
| Positive/Negative |
Use it to make your image look like a negative. |
| Sepia |
Use it to imitate faded photos and yellowish photo paper. |
| Black and White |
Use it to give your image a classic look of black and white photos maintaining its sharpness and contrast. |
| Old Photo |
Use it to get a black and white images with scratches. |
| Anaglyph 3D |
Use them to create different types of the stereoscopic 3D effect. |
| Blur |
Use it to visually smooth and soften your images. |
| Sharpen |
Use it to visually sharpen your images. |
| Noise |
Use it to add some texture to an image by way of tiny pixel dustings. |
| Mask 1 ... 6 |
Use them to add Texture to your images. |
Advanced Corrections
Working Area with Watermark Tab selected
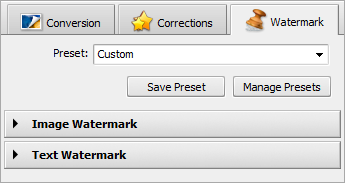
| Preset |
Use it to select one of the previously created and saved watermarks. |
| Save Preset |
Use it to save the currently created text or image watermark as a preset to use it in future. |
| Manage Presets |
Use it to open the Preset Manager window to manage the list of the existing watermark presets. |
| Image Watermark |
Use it to add an image watermark to your images. Click the black arrow left to the group name to open the Image Watermark property panel. |
| Text Watermark |
Use it to add a text watermark to your images. Click the black arrow left to the group name to open the Text Watermark property panel. |