Adding and Previewing Photos
Before you can edit your photos, you should find them on your hard disk drive or removable medium and import to the program. To do that you can use the drag-and-drop function, Main Menu or folders tree situated on the Browse Tab.
Adding Photos
Using drag-and-drop function
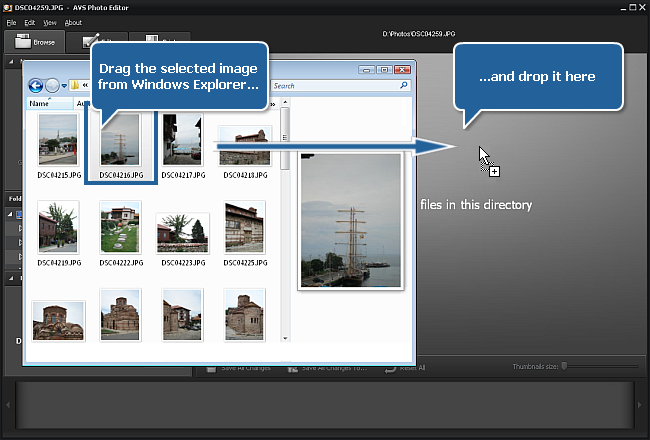
 If you find the necessary images in Windows Explorer of your PC you can select one of them left-clicking it and drag the image to the AVS Photo Editor icon on the desktop and drop it there. After that the program will be launched with all the photos from this folder loaded to it, and the added image will be displayed in the Preview Area.
It's also possible to drag and drop the images from Windows Explorer to the launched AVS Photo Editor application, when no folder containing image files is selected.
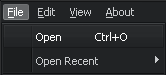
Using main menu
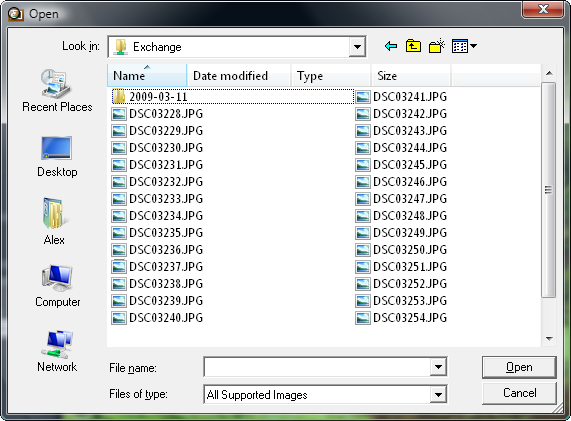
Click the File section of the Main Menu and select the Open option. Then the following window will pop up and let you find the needed image file:
If you have already opened the image you want to edit once again or you'd like to open the folder containing it, select the Open Recent option of the Main Menu. All the image files stored in the same folder with the photo you have recently opened will be loaded to the program and seen within the Navigation Panel.
Using folders tree
 It's very easy to find the photos you want to add using the Folders Tree situated on the Browse Tab. To do that you should know where the needed photos are stored on your PC or a removable medium. Here you can see the entire structure of the files and folders system on your computer. As soon as you find the wanted folder, click it and its content will be displayed within the Navigation Panel, where you can find the image you want to edit.
Previewing Added Photos
Changing view modes
After you found and added the necessary folder to the program, all of the images from it will be seen within the Navigation Panel as a sequence and within the Preview Area as thumbnails. Click one of the photos and it will occupy the whole Preview Area. By double-clicking the image or pressing the appropriate button on the toolbar you can switch to the Full Screen view mode. To return press the Esc key or click the Close Full Screen button.
Navigating through photos
To navigate through images from the imported folder you can use the Navigation Panel. You can also open the Browse Tab to view all the photos in the folder as thumbnails and find the needed one.
Rotating photos


It's possible to rotate photos in the Preview Area counter clockwise and clockwise by 90 degrees. For this purpose use the Rotate CCW or Rotate CW option of the Edit section in the Main Menu, the corresponding option of the Express Menu, or the buttons situated on the toolbar and displayed on the right.

Note: the Rotate function will be disabled, if one of the Editing Tools is being used. In order to rotate your image, press the appropriate tool button at the Edit Tab to hide the settings area and deactivate the tool.
zooming in and out
To zoom the edited image in the Preview Area select the appropriate option of the View section in the Main Menu:
- Fit - use it to resize your image, so that it fits within the preview area.
- x1 - use it to view the edited photo in full size.
- x3 - use it to view the edited photo at 300% zoom.
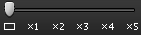 You can also use the slider situated on the toolbar and displayed on the right. The following options are available: one on screen, full size, 200%, 300%, 400%, 500%.
 It's also possible to zoom in and out the displayed image by scrolling the mouse wheel, if the mouse cursor is situated within the Preview Area while editing or within the Navigator window at the Edit Tab.
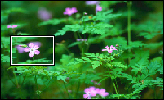
While using the zoom function you can have a look at the Navigator window situated in the Edit Tab, where you can see the image area displayed at the moment within the Preview Area. So if you zoom in the image, the image area visible in the preview area will be displayed within the white-outlined rectangle in the navigator.
While zooming in a photo some parts of the image won't be seen within the Preview Area, as this option zooms in to the center of the image. As soon as you zoom in the edited image, the mouse cursor will turn into a hand -  . To move the image and see the area you need, click the mouse button (the hand becomes closed -
  ) and, without releasing it, drag the hand cursor in the desired direction.