Adjusting Program Settings
 Within the AVS Video Converter interface you can also change some program settings. To do that click the Settings button on the Main Toolbar. A window will be opened, where you can switch between the available tabs depending on the settings you need to adjust. These tabs are:
Processing Tab
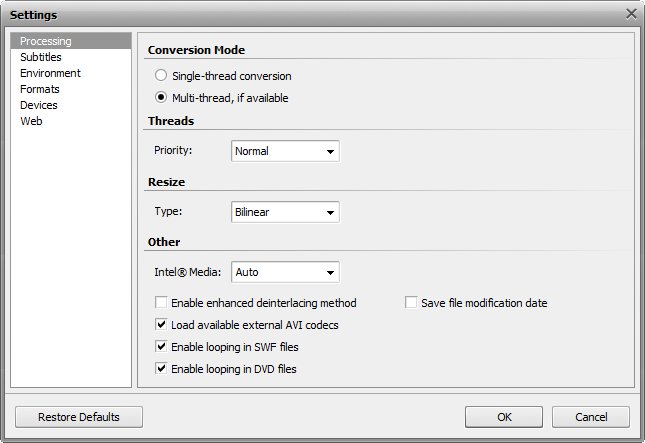
Here you can adjust settings that concern file conversion. They are:
 Note
Note: the availability of multi-threading depends also on the output format you selected.
Threads
Use this field to change the priority of the conversion process in the system (for instance, if you plan to do some other work on your computer - watch a movie, play a game, - while the conversion process takes place). The conversion Priority can be set using one of the available options: highest, above normal, normal, below normal. The normal option is set by default.
Note: but you can still change the priority level during video conversion by clicking the arrow button at the bottom of the Main Area and selecting the Conversion Priority option:

Resize
Use this field to select one of the available Resize types. They are needed for picture resizing that is done when you change the video image size - height and/or width, or alter its aspect. These resize types are:
- "Nearest Neighbor" - the simplest method of image resizing, i.e. the processing power used is the smallest, but the result also has the poorest quality. Speaking of the process itself, when the resizing is done using the "Nearest Neighbor" filter, only the pixels closest to the sample point are taken into consideration, with no input from other surrounding pixels. This method can be really recommended only in case the speed is crucial and the quality can be neglected.
- Bilinear - a slightly better method of image resizing, being a reasonable compromise between the speed and the output image quality. When the resizing is done with the Bilinear filter, a sample point takes the four closest pixel centers and linearly interpolates their color values according to their distance from the sample point. The method takes more computing power than the "Nearest Neighbor". This method is particularly useful when an image is being enlarged, or transformed without decreasing the average size.
- Bicubic - the best method of image resizing among available ones. Images resampled with bicubic filter are smoother and have fewer artifacts. At the same time this filter will require more computing time and power.
- Super - this method provides results of higher quality than the bicubic filter but consequently it demands even more computing power and is applicable only for size reduction.
Depending on your computer configuration, the time you have to perform the conversion and all the other factors, you can select one of the resize types and the appropriate resizing will be performed.
- Other
- Intel® Media - select a type of acceleration that will be performed during decoding your video:
- Auto - if you choose this option, the program will automatically detect software capabilities first and if it fails to find any, it will search for hardware capabilities;
- Software - if you choose this option, only software capabilies will be used for acceleration;
- Hardware - if you choose this option, only hardware capabilies will be used for acceleration;
- Disable - if you choose this option, all the acceleration capabilies of your software and hardware will be neglected.
- Enable enhanced deinterlacing method - if you check this box, the video quality will be considerably increased for many formats (DVD, Transport Stream, etc.) during the conversion - spots and blurred areas will be compensated.
- Load available external AVI codecs - this box is checked by default, i.e. the program will load the third-party codecs installed on your computer and will be able to use them for video conversion. If you uncheck this box, only internal AVS Video Converter codecs will be used.
- Enable looping in SWF files - this box is checked by default, i.e. output SWF files will be played back continuously. If you uncheck this box, output SWF files will be played back till the end and then the file playback will be automatically stopped.
- Enable looping in DVD files - this box is checked by default, i.e. output DVD files will be played back continuously. If you uncheck this box, output DVD files will be played back till the end and then the file playback will be automatically stopped.
- Save file modification date - if you check this box, the last modification date of the source files will be preserved for the output files. If you uncheck this box, the modification date will change to the conversion date.
[Back to the Top]
Subtitles Tab
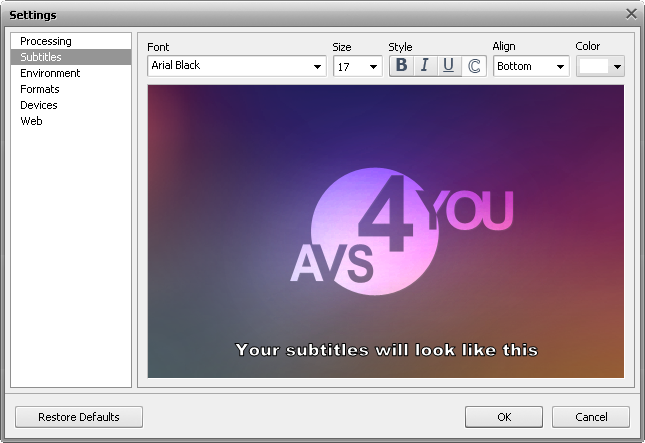
Here you can edit subtitles to make them suit your taste and needs. You can change such parameters as:
- Font - select a font for your subtitles from the dropdown menu
- Size - select a font size for your subtitles from the dropdown menu
- Style - select a font style for your subtitles: bold, italic, underline, contour
- Align - select a subtitles position from the dropdown menu: bottom, top
- Color - select a font color for your subtitles
Within the Preview Area you can see how your subtitles will look after making adjustments.
[Back to the Top]
Environment Tab
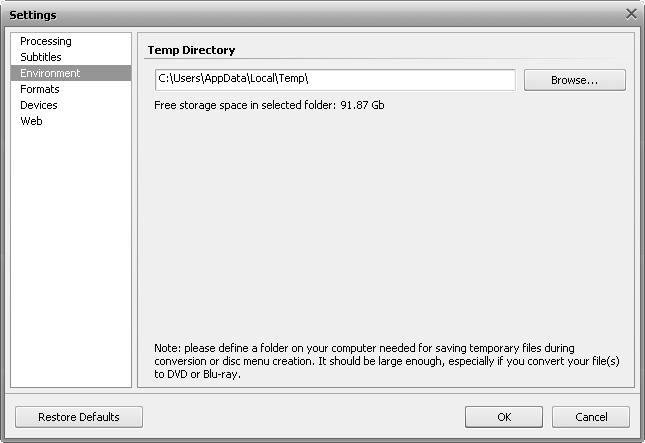
Here you can select a directory for storing temporary files that will be produced during file conversion and disc menu creation processes. Clicking the Browse... button you can change the current folder. The Temp folder on your local disk C is selected by default.
Under the Temp Directory field free storage space in the selected folder is given. Please bear in mind that this folder should be large enough depending on the input file size and the output format you selected. Otherwise the conversion process will be interrupted and you will be suggested to select another folder for temporary files or free some storage space on your hard disk drive.
[Back to the Top]
Formats Tab
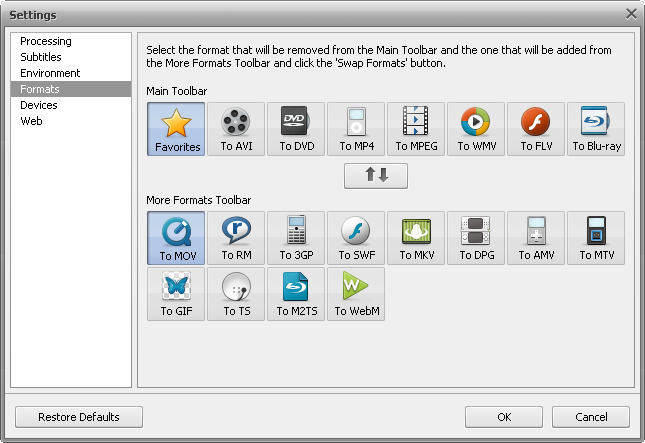
Here you can customize the Formats Tab of the Main Toolbar according to your needs. You can set the buttons, which stand for the output formats you often convert to, and they will be displayed on the Main Toolbar at program startup for you to be able to access the needed button quickly.
For this purpose proceed through the following steps:
- Click the button that will be replaced within the Main Toolbar
- Click the needed button within the More Formats Toolbar that will appear at the Formats Tab
- Press the Swap Formats button
After that the selected buttons will exchange their locations.
You can also drag and drop any format button within the other or the same toolbar and alter its position this way.
[Back to the Top]
Devices Tab
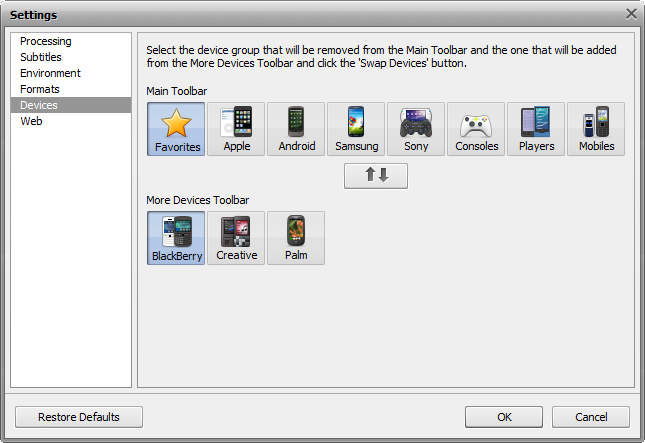
Here you can customize the Devices Tab of the Main Toolbar according to your needs. You can set the buttons, which stand for the output formats you often convert to, and they will be displayed on the Devices Tab at program startup for you to be able to access the needed button quickly.
For this purpose proceed through the following steps:
- Click the button that will be replaced within the Main Toolbar
- Click the needed button within the More Devices Toolbar that will appear at the Devices Tab
- Press the Swap Formats button
After that the selected buttons will exchange their locations.
You can also drag and drop any device button within the other or the same toolbar and alter its position this way.
[Back to the Top]
Web Tab
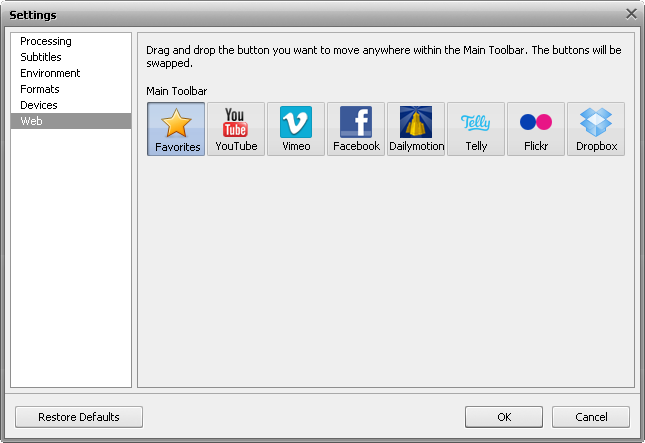
Here you can customize the Web Tab of the Main Toolbar according to your needs, i.e. change the sequence of the websites buttons. To do that, drag one of the buttons to the position you need and the other button will take its position. In this way the buttons will exchange their places.
[Back to the Top]
After you made all the adjustments, click OK to save changes and close the Settings window or the Cancel button to discard the changes made and close the Settings window. You can also return to the default settings by clicking the Restore Defaults button.