Edit Tab
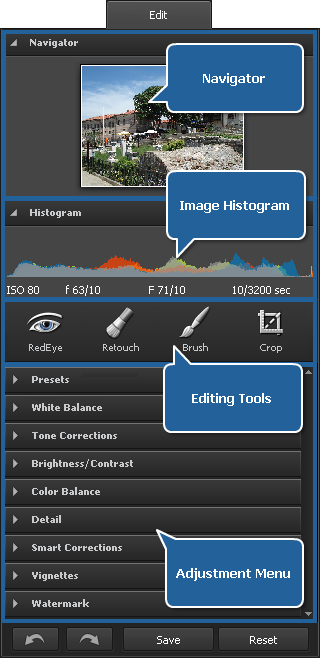
The Edit Tab is situated on the left side of the Program Window and is used to edit images using the available editing tools, adjustment menu and image histogram. It consists of the following sections:

Navigator
It is used to navigate through the photo that is displayed within the Preview Area while using zoom. In the navigator you can see the entire picture and the part of it that is currently shown within the preview area. So if you zoom in the image, the image part visible in the preview area will be displayed within the white-outlined rectangle in the navigator.
The navigator window can be hidden and then shown by clicking the upper bar.
Image Histogram
The image histogram is used to represent the distribution of colors in the edited image, derived by counting the number of pixels of each of given set of color ranges in a typical color space. To learn more on Using Image Histogram refer to the corresponding section.
Editing Tools
Here you can find the tools you can use for editing your images, such as: Red Eye Correction, Retouch, Brush and Crop.
Adjustment Menu
Here you can make adjustments to the tonal range and properties of the represented colors, apply one of the available ready presets, add a vignette or watermark to your images.
At the bottom of the Edit Tab the following buttons are situated:
 - Undo is used to reverse the last command.
 - Redo is used to repeat the last command.
- Save is used to save the edited photo under the same name and into the same folder.
- Reset is used to bring the edited photo to its original state.

Note: after saving the changes, no action can be undone or reset.