Saving Video Files
AVS Video ReMaker allows you to edit your video files without re-encoding, but you will still need to save them to apply all the changes made.
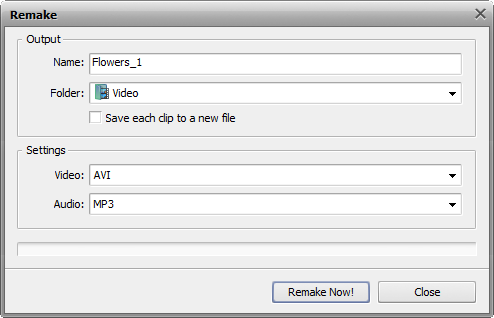
After editing your video you will be able to save it to the computer hard disk. To do it click the Remake Now ! central button. The following window will be open:

In the Output section enter the file name and choose the folder to save your resulting video. Drop down the Folder combo box and select one of the available folders or choose the Browse option to select an appropriate directory or create a new one.
If you plan to save all the added video clips as separate files check the Save each clip to a new file box, if you plan to merge them into one leave this option unchecked.
 Note
Note: if you check
Save each clip to a new file option the video clips will be saved having the same selected name but with the number added (1, 2, 3 and so on) after the selected file name.
In the Settings section you can set the video/audio output file format selecting it from the corresponding drop down list.
 Note
Note: if your video files are coded with the MPEG-2 video codec and the dimensions of the MPEG-2 image coincide with the PAL (720x576 or 352x288 and 25 fps) or NTSC (720x480 or 352x240 and 29.97 fps) parameters the program will let you save your video files to DVD format.
 Note
Note: to be able to save your video files to Blu-ray they need to meet the following criteria:
- The files added to the file list must be coded with the MPEG-2 or H.264 video codec;
- The files added to the file list must have the following video image parameters:
For interlaced video:
720х480, 29.970 fps
720х576, 25.000 fps
1920х1080, 25.000 fps or 29.970 fps
For progressive video:
1280х720 and 23.976 fps, 24.000 fps, 50.000 fps or 59.940 fps
1920х1080, 23.976 fps or 24.000 fps
When everything is ready click the Remake Now! button to start the video file processing. You will see the process progress on the progress bar in the lower part of this window. It will take some time depending on the file length and your computer configuration.
When overall progress reaches 100%, the following window will be opened:

If you choose the Burn to Disc... option, the program will burn the processed files onto an optical disc using the internal AVS Video ReMaker burning engine.