Capturing Video
 After you set up all the capture device, audio and video device parameters and audio format settings, you can start capturing video from the connected capture device.
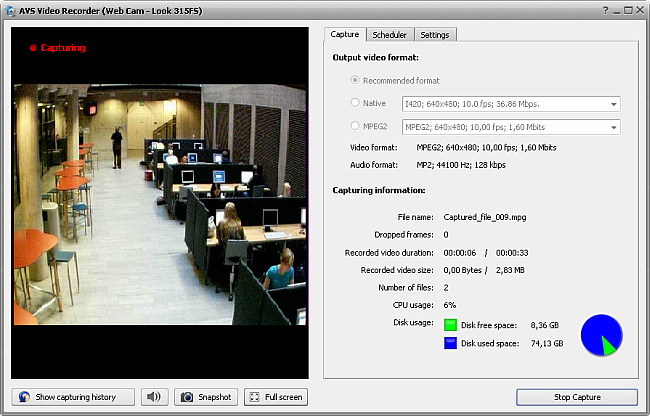
Click the Start Capture button to do that. You will see the capture information in the lower part of AVS Video Recorder. The following data is available:

File name - the name of the current captured video file.
Dropped frames - the number of frames the program had to drop from the source video so that it could keep up with the capturing process. The program can drop frames in case the computer configuration is not strong enough for capturing in real time and the CPU load is too heavy or the free disk size on computer hard disk drive is not enough. This can also happen if the capture device connected to the computer experiences some troubles.
Recorded video duration - the current duration of the captured video, measured in hours:minutes:seconds (current file/total files). In case you know the total duration of the video you would like to capture, you will be able to find out how long you still have to capture.
Recorded video size - the current size of the captured video file, measured in megabytes (current file/total files). It will depend on the selected video and audio format and format settings. You can use this data to make sure that there is enough free disk drive space on your computer hard disk drive in the current folder or partition.
Number of files - the number of the captured files.
CPU usage - the load on the central processing unit measured in percent.
You can also control the free and occupied disk space in the Disk free space/Disk used space section or watching the colored diagram where the green color is used to display the current value for the free space and the blue color shows the place occupied with files.
You can stop capturing any time if you press the Start Capture button once again (actually it will turn to Stop Capture once the capturing process is started).
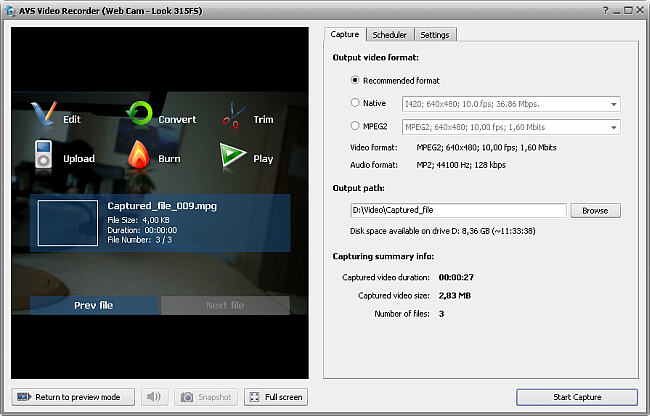
After the capturing is over or if you press the Stop Capture button, you will be presented with the options of what can be done with the captured video:

You can:
- Edit, Trim - use these options to import the captured files into AVS Video Editor and insert various transitions between clips, apply audio/video effects, cut out unnecessary scenes, add text or voice comments to them etc.
- Convert, Upload, Burn - use these options to launch AVS Video Converter and convert your captured video, transfer it to your mobile device or burn onto a disc.
- Play - use this option to launch AVS Media Player and playback your captured video.
If you do not have any of the above programs installed on your computer you will be offered to download and install them.
Use the Previous file and Next file buttons to navigate between the captured video files and Start Capture to capture more files.