Crop Tool
 The Crop tool allows you to select an image area and discard everything outside this area. You can also rotate, adjust width and height and zoom this area in.

Using
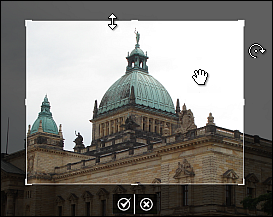
After pressing the Crop button you'll see all the available tool settings and the image will be enclosed in a gray-outlined rectangle. As soon as you hover the mouse cursor over its edge, the rectangle will become active and the mouse cursor will turn to a double-sided arrow -  . So you can zoom in an object displayed in the photo.
As soon as you move your mouse cursor outside the rectangle, it will turn to a round arrow -  - that allows you to rotate the image in the direction you want.
Within the rectangle you can use a hand cursor -  - that can be used to drag the image till the needed area is situated within the rectangle.
 To apply changes made and hide the crop settings area, click the left button, whereas after pressing the right button all the changes made will be discarded.

Settings
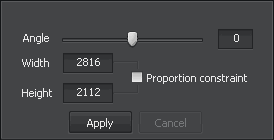
You can change the tool settings by dragging the indicator of the appropriate slider or entering a value into the box situated next to it and pressing the Enter key. The following tool settings can be adjusted:
- Angle - rotation angle of the edited image.
- Width - width of the cropped image part.
- Height - height of the cropped image part.
- Proportion Constraint - check this box to crop your image preserving the aspect ratio.
- Apply - after pressing this button all the changes made will be seen within the Navigator window.
- Cancel - after pressing this button the changes made will be discarded.
Example
In the figures below you can see an image before and after applying the Crop tool:

Before applying the Crop tool

After applying the Crop tool