Converting to FLV Format
To convert your video file to FLV format:
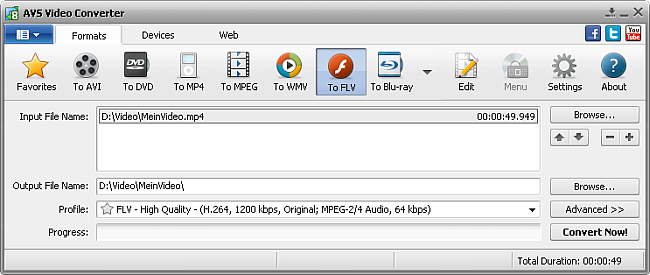
Press the To FLV button at the Formats Tab of the Main Toolbar.
Enter the Input File Name clicking the upper Browse button.
Enter the Output File Name clicking the lower Browse button.
Select a FLV Profile.
To edit the selected FLV profile or just preview Input and Output File properties, open the Conversion Options Tab by pressing the Advanced >> button.
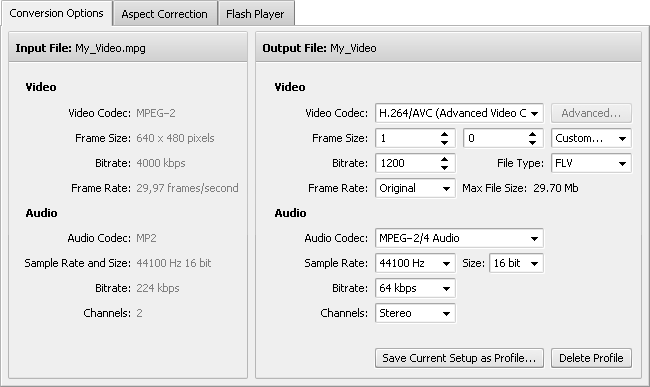
Here you can customize the following audio and video settings of the output video file:
| Video Codec |
- |
Select a video codec from the list of ones installed on your computer. |
| Frame Size |
- |
Select the necessary width and height values in the first and second boxes or choose the aspect ratio you need in the third one (setting width and height values to 0 keeps the original parameters of the frame). |
| Bitrate |
- |
Select the number of bits that are processed per unit of time. Setting a higher bitrate value will increase the output video quality and file size. |
| File Type |
- |
Select the needed file type from the list of available ones. |
| Frame Rate |
- |
Select the frequency at which unique consecutive video images called frames will be produced (expressed in frames per second). Setting a higher frame rate value will increase the output video quality and file size. |
| Max File Size |
- |
Indicates the maximum size of the output file (it's visible if the Split box is unchecked and FLV file type is selected). |
| Audio Codec |
- |
Select an audio codec (i.e. audio format) from the list of ones installed on your computer. You can also choose the No Audio option to create an output video file without any audio track. |
| Sample Rate and Size |
- |
Select the number of samples per second taken from a continuous signal to make a discrete signal (expressed in Herz) and their size. Setting a higher sample rate value will increase the output video quality and file size. |
| Bitrate |
- |
Select the number of bits that are processed per unit of time. Setting a higher bitrate value will increase the output video quality and file size. |
| Channels |
- |
Select the number of channels. |
To save the parameters you set as a new profile, click the Save Current Setup as Profile... button. To delete a certain profile from the Profile list, click the Delete Profile button.
- Switch to the Flash Player Tab to create a flash player and HTML page for it and customize player settings.
Click the Edit button on the Main Toolbar to add necessary effects.
Press the Convert Now! button.
 Note
Note: while the conversion is performed, you can select one of the available
Final Actions in the
Pause button menu to play sound of the converted video, to close
AVS Video Converter or to shutdown your PC after conversion. The default option is
Do Nothing.
As soon as the conversion is completed and if the Final Action is set to default, the following window pops up:
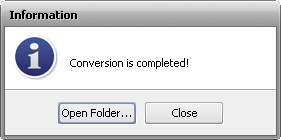
To open the folder containing the converted video file, play it back and check its quality, press the Open Folder... button. To close the Information window, press the Close button.