Setting Chapters
The Timeline tool allows you to put chapters to help you in applying effects and editing your movies. Using chapters can help you visually control working with files, but the basic purpose of using chapters is splitting (see Splitting Video Files) and indicating chapters for a disc menu (see Creating Menus for Your Discs).
To add chapters:
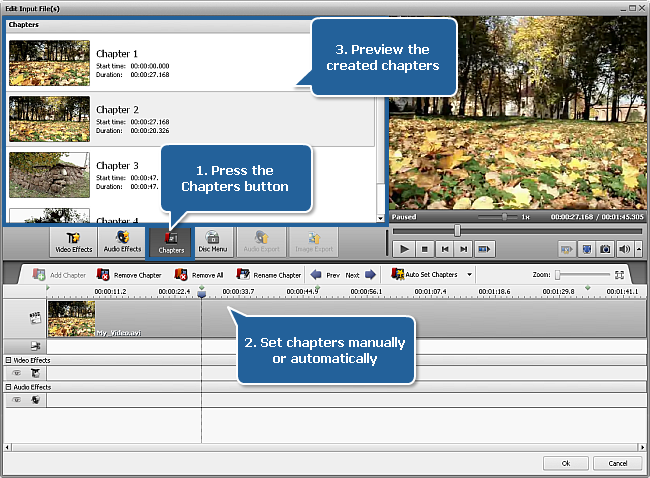
- Press the Edit button at the Main Toolbar to open the Edit Input File(s) window.
- Click the Chapters central button.
- Set chapters. Here you have two options:
You can set chapters manually
To do that put the timeline cursor at the position where you'd like to set a chapter and click the Add Chapter button located on the Timeline Toolbar. The added chapter will be shown on the Timeline as a green rhombus.
You can set chapters automatically
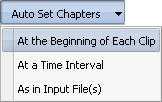
 To do that press the Auto Set Chapters button and select one of the available options:
at the beginning of each clip
If you select this option, the chapters will be added to the beginning of each file added to the program.
at a time interval
If you select this option, the Interval window will pop up to let you enter the needed time period between chapters.
as in input file(s)
If you select this option, the chapters will be set as in your input file. In case you imported a DVD/Blu-ray video file (i.e. VIDEO_TS.IFO or index.bdmv), the chapters will be added to the beginning of each chapter.
All the added chapters will be displayed in the left upper area of the Edit Input File(s) window.
To delete chapters:
Select the chapter you want to delete clicking it with the mouse.
Click the Remove Chapter button to remove a chapter or right-click this chapter and select the appropriate option from the express menu. To remove all the chapters press the Remove All button or use the appropriate option of the express menu.
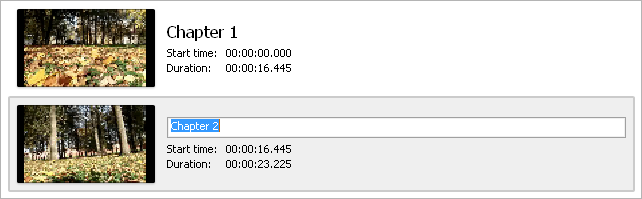
To rename added chapters:
Select the needed chapter in the left upper area of the Edit Input File(s) window by left-clicking it.
Press the Rename Chapter button or right-click the chapter and select the appropriate option of the express menu. You can also double-click the needed chapter.
Type in the name you want in the enter field.
Click anywhere else with the mouse or press the Enter key.