Applicable Elements Area
The Applicable Elements Area is located in the left part of the Edit Input File(s) window and is used to select and apply the needed video or audio effect, a disc menu style as well as to view added chapters.
This area can look different depending on the Central Button that was pressed. So it has three views:
Video/Audio effects View
The Applicable Elements Area looks like this after you pressed the Video effects or Audio effects button.
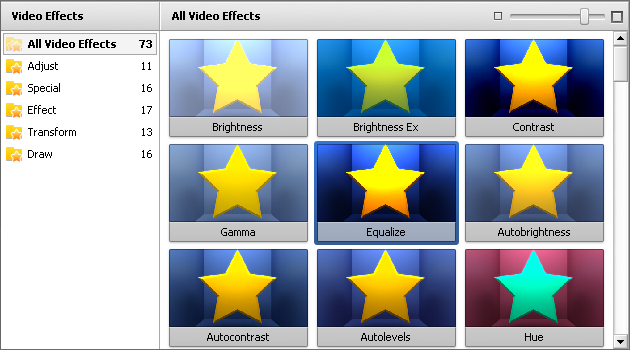
 In the right upper corner of the Applicable Elements Area a special slider is situated that is used to change the size of effects thumbnails. By moving the indicator along the slider you can set the size you need.
To facilitate search for the needed effect, all the effects are organized into groups. You can see them in the left upper corner of the Applicable Elements Area. These groups are:
| All the available video effects from all groups |
All the available audio effects from all groups |
| Brightness, Brightness Ex, Contrast, Gamma, Equalize, Autobrightness, Autocontrast, Autolevels, Hue, Saturation, Temperature |
Amplify, Compressor, Expander, Fade, Normalize, Silence, Vibrato |
| Sepia, Old Movie, Glass Mosaic, Grid Mosaic, Puzzle, Pan & Zoom, Glass, Snow, Watercolor, Pencil Sketch, Glow, Warm Glow, Wind, Gray Out, TV Simulation, Newsprint, Film, Timer, Wide Angle Zoom, Water Mirror, Particles, Canvas, Color Exchange, Anaglyth 3D, Writing Text, Countdown |
Flanger, Chorus, Delay, Phaser, Reverb |
| Blur, Sharpen, Mosaic, Gaussian Blur, Noise, Diffuse, Motion Blur, Emboss, Minimal, Maximal, Deinterlace, Median, Invert, Colorize, Grayscale, Posterize, Threshold |
Pitch Shift |
| Flip, Twist, Perspective, Skew, Shift, Rotate, Resample, Zoom, Mirror, Twirl, Ripple, Wave, Sphere, Cylinder, Glass Tile, Broken Glass |
Invert |
| Image, Line, Rectangle, Invert Rectangle, Ellipse, Invert Ellipse, Polyline, Polygon, Pie, Simple Pie, Sector, Simple Sector, Border, Text, Text in Rectangle, Credits |
Band Filter, Noise Remover |
 Note
Note: the full description of available video and audio effects as well as instructions on how to apply them you can find in the
Applying effects section.
 To apply the selected video or audio effect, drag and drop it in the appropriate line on the Timeline or right-click the effect and select the only option of the Express menu.
chapters View
Right after pressing the chapters button the Applicable Elements Area turns clear. But as soon as you start adding chapters to your video you will see their thumbnails appear within it.
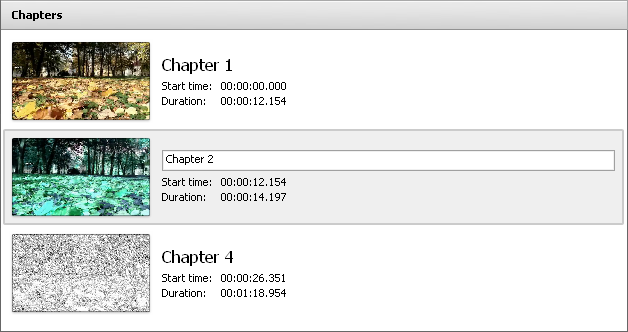
Each chapter gets a number as well as its start time and duration indicated in Hours:Minutes:Seconds.Milliseconds. By clicking one of the chapters you can navigate through them and watch in the Preview Area.
To facilitate the access to the main operations with chapters you can use the Express menu. It will pop up after right-clicking a chapter within the Applicable Element Area.
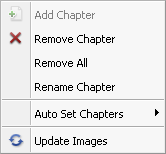
- Add Chapter - is used to add a chapter at the current timeline cursor position;
- Remove Chapter - is used to remove the selected chapter;
- Remove All - is used to remove all added chapters;
- Rename Chapter - is used to rename the selected chapter;
- Auto Set chapters - is used to add chapters automatically: at the beginning of each clip, at a time interval or as in input file(s);
- Update Images - is used to refresh chapters thumbnails.
Note: all the instructions on how to add chapters you can find in the
Setting chapters section.
Disc menu View
The Applicable Elements Area looks like this after you pressed the Disc menu button.
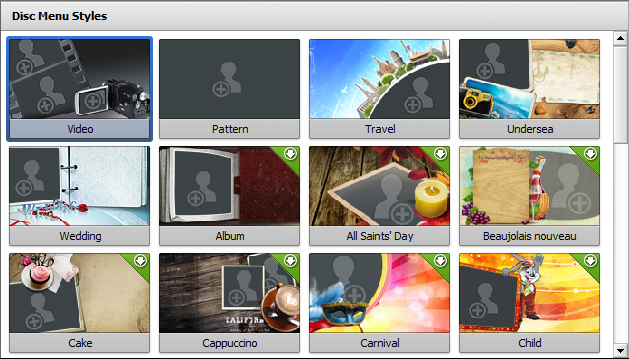
 Here you can view and select a ready style for your disc menu. To apply a menu style just double-click it or right-click and select the only option of the Express menu.
Some of the menu styles have in the right upper corner an icon -  - it means that they are not included into the program installation file. If you'd like to use these styles, you need to download them from our website.
Note: all the instructions on how to create a disc menu by applying and customizing a menu style you can find in the
Creating Disc menus section.