Timeline/Storyboard Area
The purpose of the Timeline/Storyboard Area is creating and editing your movies. Here you can create, edit your video, add different effects to your video. The Timeline/Storyboard Area can be represented in two views:
- Timeline view - is used when you add different effects - video effects, audio, text and video overlay - to your video.
and
- Storyboard view - is used to add videos and transitions to the Timeline/Storyboard Area.
You can easily switch between both views using the appropriate buttons:
 - is used to switch into Timeline view;
 - is used to switch into Storyboard view.
Timeline View
The Timeline view allows you to achieve accuracy and precision in applying effects and editing your videos.

AVS Video Editor allows you to apply one or several effects to your media file. For details on a specific effect, please refer to respective chapters. The Timeline view displays all the possible editing options simultaneously. You can see the Video Effects, Text, Video Overlay and Audio Mix lines used to edit your video clip.
- To expand any effect applied to the video you need to press the '+' button near it, to collapse it press the '-' button.
- To hide the audio track of the main video or the video overlay use the
 button, to display it use the
  button.
- To include an effect or a media file into your output video or to exclude it from it the Enable/Disable line
 button is used.
- To block the line while applying effects to other lines, use the Lock/Unlock line
 button.
[Back to the Top]
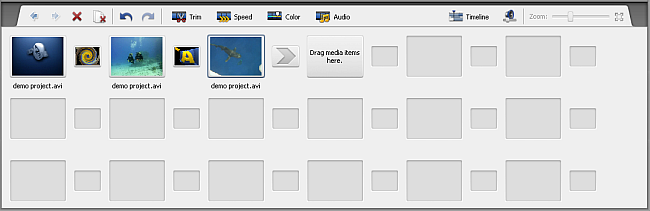
Storyboard View
The Storyboard view shows the sequence of video clips with the Transitions between them. You can change the order of clips in your video. To add clips to the Storyboard simply drag them from Files and Effects Area and drop to the necessary place in the Storyboard. The same way the transitions are added.
[Back to the Top]
Timeline/Storyboard Toolbar
When you select a line with video or effect certain buttons will be available on the Timeline/Storyboard Toolbar:
 Note
Note: the
Toolbar buttons differ depending on the element selected and can be present or absent for various elements. Some buttons can be grouped together into the
 More Options
 drop-down menu.
 |
Split |
Use this button to split the video into two parts at the current cursor position. This button is only available if a video clip is selected on the Timeline. |
 |
Delete |
Use this button to delete the currently selected element (video clip with the adjacent transition, video effect, text, video overlay or audio mix) from the Timeline/Storyboard. |
 |
Delete All |
Use this button to delete all the elements (both video clips and transitions) from the Storyboard. |
 |
Move Left |
Use this button to move the video clip towards the beginnig of the movie (i.e. to the left part of the Storyboard). This button is only available if a video clip is selected on the Storyboard. |
 |
Move Right |
Use this button to move the video clip towards the end of the movie (i.e. to the right part of the Storyboard). This button is only available if a video clip is selected on the Storyboard. |
 |
Undo |
Use this button to reverse the latest performed command. If this option is not available, there is no action to undo. |
 |
Redo |
Use this button to repeat your latest performed command or action. |
 |
Trim |
Use this button to edit your video clips and video overlay effect duration. See the Trimming Video section for more information on this option. This button is only available if a video clip or video overlay effect is selected on the Timeline/Storyboard. |
 |
Speed |
Use this button to change the playback speed of your video. This button is only available if a video clip is selected on the Timeline/Storyboard. |
 |
Color |
Use this button to adjust the tonal range, color, and sharpness of your video. This button is only available if a video clip is selected on the Timeline/Storyboard. |
 |
Audio |
Use this button to apply some audio effects to the audio track of your video. This button is only available if a video clip is selected on the Timeline/Storyboard. |
 |
Stabilization |
Use this button to make the video image more stable and reduce jittering or blurring caused by shaky motions of a camera. This button is only available if a video clip is selected on the Timeline/Storyboard. |
 |
Video Effects |
Use this button to edit a video effect applied directly on the main video. This button is only available if a video clip with an applied effect is selected on the Timeline/Storyboard. |
 |
Transition |
Use this button to edit the selected transition duration. This button is only available if a transition is selected on the Timeline/Storyboard. |
 |
Edit Effect |
Use this button to open the Properties window to edit the applied effects. This button is only available if a video effect is selected on the Timeline. |
 |
Duration |
Use this button to edit the selected element duration on the Timeline. This button is only available if a video effect or text is selected on the Timeline. |
 |
Edit Text |
Use this button to open the Properties window to edit text. This button is only available if a text is selected on the Timeline. |
 |
Edit Overlay |
Use this button to open and edit the video overlay Properties window. This button is only available if a video overlay is selected on the Timeline. |
 |
Change Color |
Use this button to open the Color window and edit the selected color or add a new one. This button is only available if a background image is selected on the Timeline. |
 |
Storyboard |
Use this button to switch to the Storyboard view. |
 |
Timeline |
Use this button to switch to the Timeline view. |
 |
Volume and Balance |
Use this button to open the Volume and Balance window and adjust these audio settings. |
 |
Project aspect ratio |
Use this button to change the Project aspect ratio if needed. By clicking the black arrow you will see these variants: 4x3, 16x9 and Custom. |
 |
Zoom |
Use the Zoom slider to zoom in and out the video and the effects on the Timeline. Click the Zoom to fit button to disable zooming. This option is disabled when you switch to the Storyboard view. |
[Back to the Top]