Editing Video Overlay
Once a video overlay effect is added to the Timeline you can change the overlay properties. Click the video overlay at the Timeline and press the Edit Overlay button of the Timeline Toolbar. Or alternatively right-click the video overlay at the Timeline and select the Edit Overlay option of the right-click express menu. The following window will be opened:
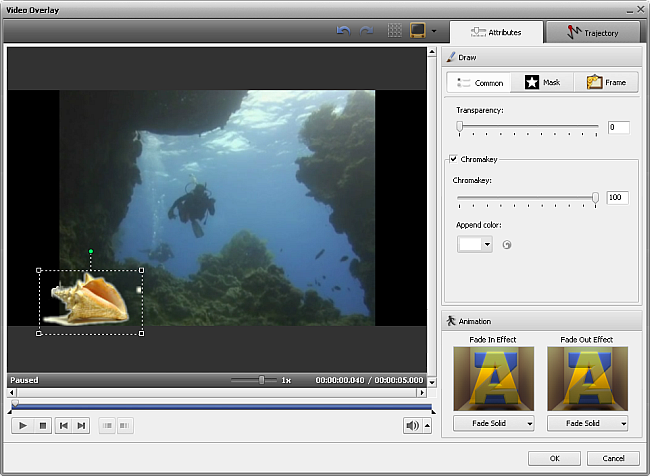
You can change the following overlay properties:
Attributes tab

Draw section
The Draw section comprises three tabs: Common, Mask and Frame settings. Switch between these tabs to modify the overlay properties.

- The Common tab allows you to make your image transparent and apply the Chromakey effect.
- Transparency - the transparency of the video or image used for the overlay (can differ from 0 - not transparent video - to 100 - full transparency).
- Chromakey - activate this checkbox to apply a composite effect which allows you to add video overlay that will be half transparent so that only part of it will be visible and all the rest will disappear to reveal the video underneath. You can specify its value using the Chromakey slider.
- Append Color - select the color to be transparent. You can select the color that forms the area you would like to be transparent from the drop-down list clicking the black arrow or you can pick a color from the image. To do that click the color field and move the color picker to find the appropriate color. You can also zoom in the image to select colors with more precision. If you don't like the result use the Reset all colors button to discard the changes.
The Mask tab offers you a wide range of invisible layers which can be placed over your video or image object.
The Frame tab includes various photo frames which make your video or image object more attractive.
It's also possible to change the angle of the Video Overlay effect. Click the green circle  (visible when the overlay is selected with the mouse) with the left mouse button, the mouse cursor will change into a round arrow -
  - click the mouse button and, without releasing it, drag it to change the video overlay orientation.
You can also change the Video Overlay box size using the black squares  on its boundaries (the mouse button will look like this
  when you hover it over one of the black squares - click the mouse button and, without releasing it, drag it to change the video overlay size).
Animation section
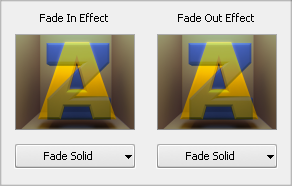
You can choose the effect used when the overlay appears in your video clicking the drop-down menu beside the Fade in Effect caption and selecting the necessary effect from the list of available ones. The same is done for the Fade out Effect.
The duration of the Fade in and Fade out for the video overlay is set on the preview slider. You can set Fade-in and Fade-out boundaries by dragging the cursor  of the slider area to the place where you want the Fade-in area to end and hit the
  button. The Fade-in area will be marked. Then drag the same cursor to the place on the slider area where you want the Fade-out area to begin and press the
  button. After that the Fade-out area will be marked.
It's also possible to direct the mouse cursor at the edge of the slider area and drag the boundaries inwards or outwards. If you want to set the Fade-out effect, drag the right edge of the slider area to the left. To apply the Fade-in effect, drag the left edge of the slider area to the right (see the figure below)

[Back to the Top]
Trajectory tab

The Trajectory tab is used to change the path of the video overlay throughout the movie image. You can select one of the presets from the list:
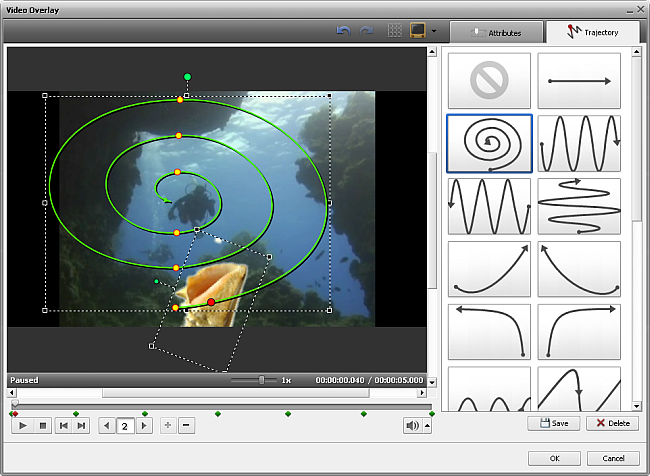
The selected preset will be displayed in the preview area with the chosen trajectory drawn (the green line). The small yellow circles show the overlay time stamps when the trajectory changes direction, the red one marks the current overlay position. You can use the following buttons under the preview area to manage the trajectory:
 |
Playback |
Is used to start video file playback. Once you click it, it will turn into the Pause button to let you pause the playback when needed. |
 |
Frame Back |
Is used to step one frame back in the video. |
 |
Frame Forward |
Is used to step one frame forward in the video. |
 |
Navigation |
Is used to navigate through the trajectory time stamps. The  lets you quickly go to the previous time stamp of the trajectory and the lets you quickly go to the previous time stamp of the trajectory and the  to the next one. The digit field shows the current time stamp number. to the next one. The digit field shows the current time stamp number. |
 |
Add Time Stamp |
Is used to add a new time stamp at the current overlay position. You can change the trajectory at this time stamp after that clicking it with the mouse and dragging it to the desired position. |
 |
Remove Time Stamp |
Is used to delete the currently selected time stamp. The trajectory will be changed to a straight line connecting the two time stamps before and after the deleted one. |
The necessary time stamp can be selected not only using the Navigation buttons, but also with the mouse. To do that, click a rhombus representing the necessary time stamp with the mouse (the mouse cursor will turn into a hand):

After that you can either delete the selected time stamp, or alter the trajectory, or change the time stamp position on the timeline. Click it with the mouse and, without releasing the mouse button (the cursor will turned into a closed hand), move the time stamp left or right changing its position:

You can also change the direction of your trajectoty using the time stamps. Click it with a left mouse button (the cursor will look like this -  ), then without releasing the mouse, drag it to a new position.
[Back to the Top]
Presets
Any changes you make to the trajectory of the Video Overlay effect can be saved to a preset so that you can use them later if you plan to apply the same overlay trajectory to a different video.
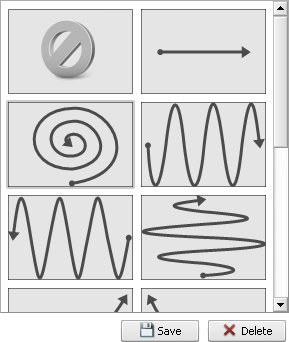
Use the Preset area of the appropriate tab, click the Save button to save the currently edited video overlay trajectory as a preset.
You can also remove unnecessary presets from the list using the Delete button of the preset area.
[Back to the Top]
Video Overlay Toolbar
You can use the Video Overlay Toolbar over the preview area to additionally manage the overlay. It has the following buttons:

 |
Undo |
Use this button to undo the latest performed action. |
 |
Redo |
Use this button to redo the latest undone action. |
 |
Show Grid |
Use this button to show or hide the vertical/horizontal grid lines. This might be helpful if you want to align the overlay in the video. |
 |
TV Safe Zone |
Use this button to show or hide the borders of the 4:3 CRT display, 4:3 LCD display and 16:9 LCD widescreen display so that you could see if the video and all its elements will be displayed correctly on a screen of your display/TV set during the playback. |
[Back to the Top]