Using MultiTrim Option
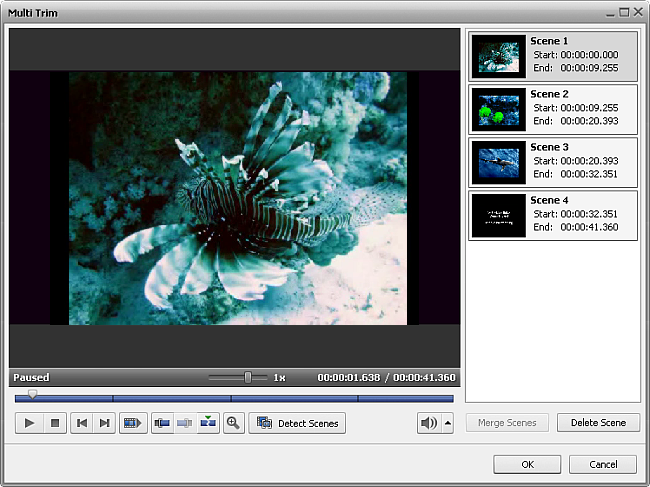
The MultiTrim option is very useful in case you need to delete several scenes in different parts of the video clip - beginning, end or anyplace in the middle. Open the MultiTrim window.

The window buttons are used the following way:
 |
Play |
Is used to start video file playback. Once you click it, it will turn into the Pause button to let you pause the playback when needed. |
 |
Stop |
Is used to stop video file playback. Every time you use it to stop the playback, the cursor goes back to the beginning of the file. |
 |
Previous frame |
Is used to step one frame back in the video. |
 |
Next frame |
Is used to step one frame forward in the video. |
 |
Next scene |
Is used to find the next scene in the video clip. Once you click it, it will turn into the Stop button to let you stop searching scenes when needed. |
 |
Mark in |
Is used to mark the beginning of the current trimmed area. |
 |
Mark out |
Is used to mark the end of the current trimmed area. |
 |
Split |
Is used to split the video into scenes at current cursor position. |
 |
Zoom |
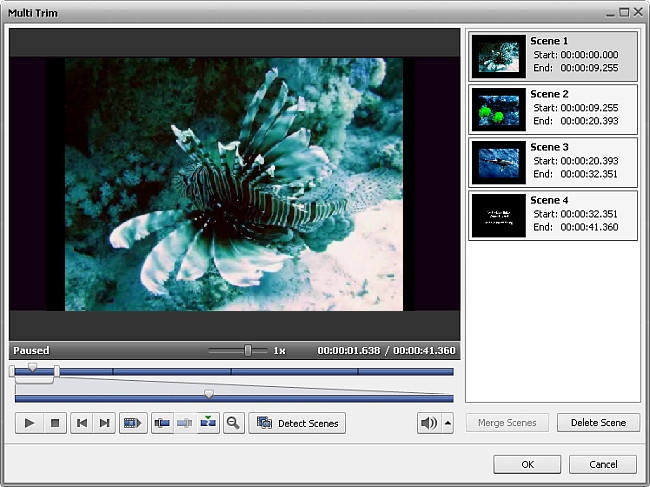
Is used to open the zoom timeline (see below). |
 |
Detect Scenes |
Is used to start scene detection. |
When you click the Zoom button the zoom timeline will be displayed. In this case the upper part will show the whole video clip timeline and the lower part will only show the area between the  and
and  enlarged. This way you can find the necessary scene more easily using the lower timeline.

You can either manually select all the scenes in the video clip and choose what to keep and what will be deleted or find the scene changes automatically. For manual scenes marking place the slider cursor to the place where you want your video to begin. Do it using the mouse button. You can find the exact position in the video using the Previous frame or Next frame button.
Click the Mark in button to mark the beginning of the scene and the Mark out button to designate the end of the trimmed scene - the video within the highlighted area will be left. The same way all the other scenes are trimmed.
Although it might be better use the scene detection algorithm offered by AVS Video Editor. To do it click the Detect Scenes  button. It will take the program some time to find all the scenes in the video. After this is done, the found scenes will be displayed in the right part of the MultiTrim window.
Now you can select one of the scenes and click the Delete Scene button to remove the scene from the video, or select several scenes with the mouse (the Ctrl and Shift buttons on the keyboard might help you in this - press and hold them while selecting scenes with the mouse to select several videos) and click the Merge Scenes button to join the selected scenes together.
If you want, for example, to join the first and the third scenes and delete the second one, please, don't use the Merge Scenes option as in this case all the previously selected deletion areas will be discarded. Go back to the main window and drag-and-drop the necessary scenes to the Timeline/Storyboard Area from the Files and Effects Area in order to continue editing.
To accept the changes click the OK button, to discard the changes and close the Trim window use the Cancel button.