Saving Videos
 After you create a movie, edit it and everything is ready to be saved, you can press the Produce... button in the center of the program window or use the Produce... option of the File section of the Top Menu.
The following window will be opened providing the choice to save your movie into a desired format:
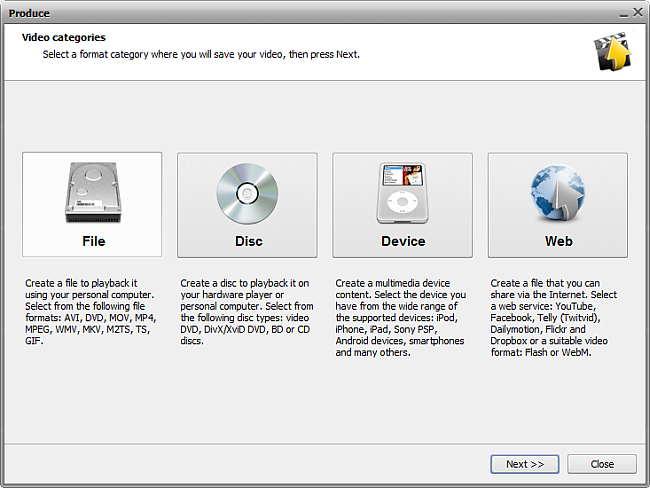
The options are:
- Save to File - use this option to create an AVI, DVD, MOV, MP4, MPEG, WMV, MKV, M2TS, TS, GIF video file onto your computer hard disk drive. You will be able to watch the video using some software player program (AVS Media Player, for instance).
- Save to Disc - use this option to create a DVD-video or Blu-ray disc with a menu, or a DivX/Xvid disc compatible with most up-to-date hardware DVD players. Once the video is saved you will be offered to burn a disc with your movie that can be watched using your home hardware player.
- Save to Devices - use this option to create a video for mobile players, mobile phones or gaming consoles of yours and upload it right to the device. The most popular devices such as Apple iPod, Apple iPhone, Apple iPad, Sony PSP, Android and BlackBerry devices are supported.
- Save for Web - use this option to create a video that can be streamed via web and save it into Flash or WebM format. It's also possible to save video for the popular web services: YouTube, Facebook, Telly (Twitvid), Dailymotion, Flickr and Dropbox.
Make your choice and click Next >> to go to the next screen:
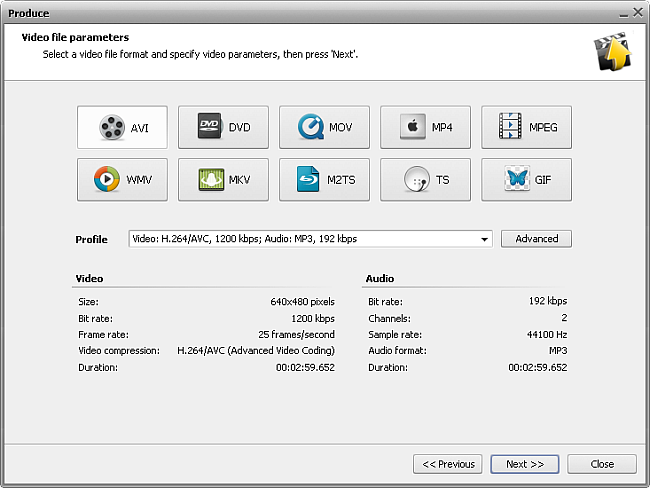
Depending on what you selected at the first step, the second step will either offer you a number of formats to save your video or a list of devices that the output video will be compatible with. You will be also able to change the output format settings if you would like to using the Advanced button.
 Note
Note: please, make sure you know what you are doing, as in some cases the settings change can make the output video incompatible with the device that will be used to watch it.
Click the Next >> button to proceed to the next step:
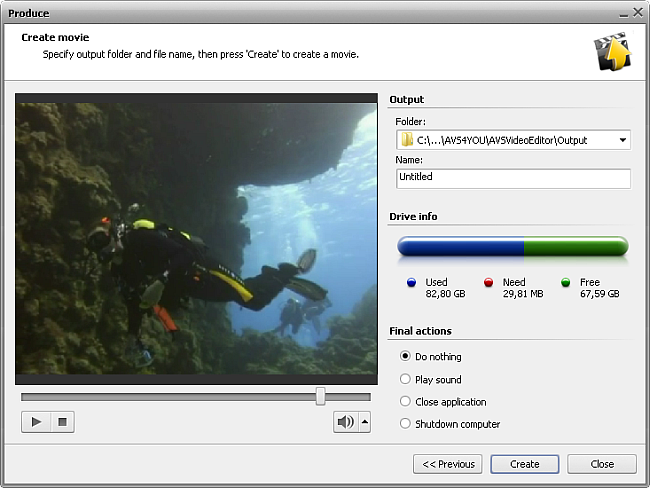
Here you can select:
- Output folder - a folder on your computer used to store the output video file.
 Note
Note: when saving video onto a
disc or for a
portable device please make sure you select a folder on your computer
hard disk drive. You will be able to burn a disc or upload video to a portable once it is saved.
- Name - the file name used for your output video.
- Drive info will show the selected destination capacity and the place that will be taken by the output video file.
You can also select actions to be performed once the file is saved: you can choose to Do nothing, Play sound to alert you that everything is ready, Close application to exit from AVS Video Editor and Shutdown computer.
The final preview of the future movie is possible to make sure that everything is alright. Then click the Create button to start the video saving process:
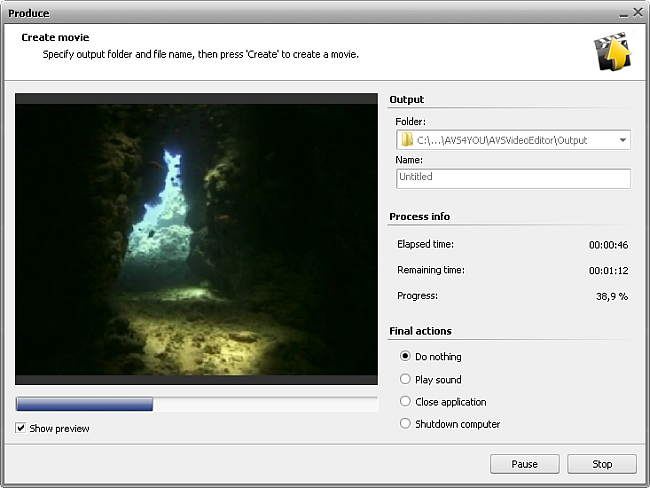
You will monitor the process of file creation using the preview (if Show preview is checked) and the additional information:
- Elapsed time - the time spent by the program since the beginning of the file saving process.
- Remaining time - the estimated time till the file saving process is finished.
- Progress - the progress of the process shown in percent.
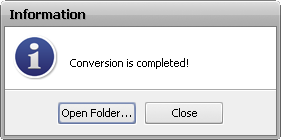
When overall progress reaches 100%, the program will offer some further actions depending on what you chose before and on the format selected. For instance, for the Save to File option the following dialog window will appear:
