Files and Effects Area
The Files and Effects Area serves multiple purposes:
- shows all the media files imported to the program and lets import new ones;
- shows the available effects and transitions;
- lets users record voice from a microphone connected to the personal computer;
- allows users to create chapters for the output video.
It looks different depending on the central button enabled.
Media Library view
 When you click the Media Library button, the Files and Effects Area shows the imported media files divided into categories: All, Video, Image and Audio. Each imported file is marked with a special pictogram according to its category:
 - for videos;
 - for images;
 - for audio tracks.
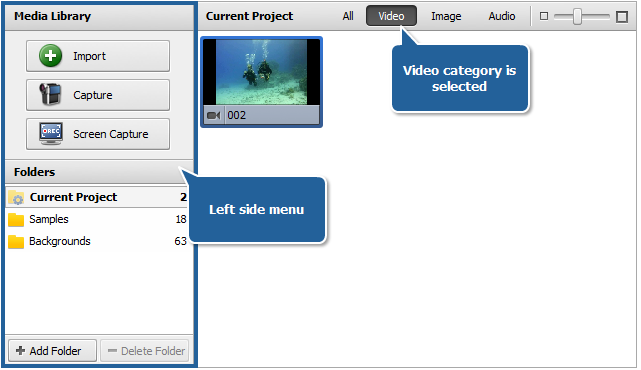
You can select one of the categories to display all the files of a certain selected type (video, image or audio) available in it. Here is an example of the selected video category:

The Left Side Menu helps you add new content to the Media Library and easily manage it using the Folders section.
If you want to add some video or other media, you will need to import it first. To do that click the Import button and browse for media files or simply drag-and-drop them to the program window. You can also capture video from a capture device connected to your personal computer clicking the Capture button or use the Screen Capture button to record your desktop.
The Folders section comprises:
- Current Project folder displays media files that are used in the project you are working at.
- Samples folder contains various media files that you can use for your project if you like.
- Backgrounds folder displays image files of different colors that can be used in your project.
You can create you own folders using the Add Folder button or delete the unnecessary ones from the list with the Delete Folder button.
Transitions/Video Effects/Text view
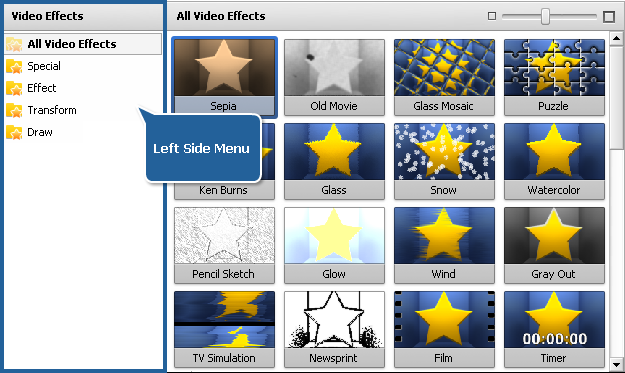
 When you click the Transition, Video Effects or Text button, the list of all the available transitions, video or text effects will be displayed. Here is an example of the Video Effects button enabled:

Use the Left Side Menu to display all the available transitions, video/text effects or sort them by subcategories.
Voice/Disc Menu view
 When you click the Voice button, the audio recording settings become available. Please, refer to the Recording Voice section to see how the Files and Effects Area will look like.
 When you click the Disc Menu button, the list of all the available menu styles will be displayed. Please, refer to the Creating Disc Menu section to see how the Files and Effects Area will look like.
 Note
Note: You can change the representation of the elements on the
Files and Effects Area moving the slider cursor in the right upper corner. Move it to the right to zoom in the
Thumbnails or to the left to zoom them out and display the
List view.