Playing and Recording
In AVS Audio Editor you can operate Play and Record as well as other transport functions in the same way as in any standard home player or recorder. Audio Player Toolbar is situated in the left bottom corner of the Main Window.
 - Click Play to play the portion of the waveform that is currently being viewed, or the portion that is highlighted.
 - Click Pause to pause the playback.
 - Click Stop to end waveform playback.
To adjust the playback volume and balance, press the Options...  button on the Tools Tab. In the opened window switch to the Playback tab:
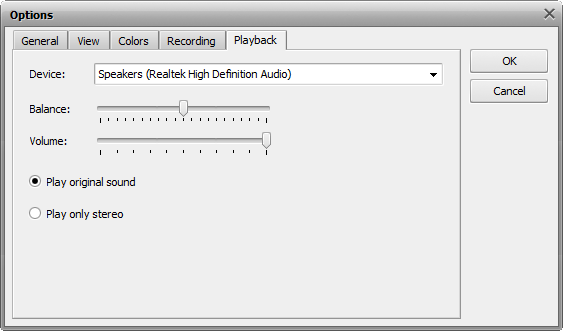
Here you can:
- select the device used for playback in the Device drop-down list;
- adjust the device Balance using the corresponding slider (move to the left to make the sound play in the left speaker, move to the right to make it play in the right speaker);
- adjust the Volume using the corresponding slider (move to the left to desrease volume, move to the right to increase volume).
The Play original sound and Play only stereo options are used to let the player decide how to playback the audio. This might be useful when you playback a multichannel (5.1 and more channels, for instance) audio on stereo speakers/headphones.
 - Click Record on the Audio Player Toolbar to start recording at the current insertion point.
You can configure your input devices right from AVS Audio Editor, without need to go to the windows Control Panel. To do that, press the Options... button on the Tools Tab or use the Advanced  button on the Record Tab. In the opened Options window switch to the Recording tab. The form that will let you change the device settings will appear:
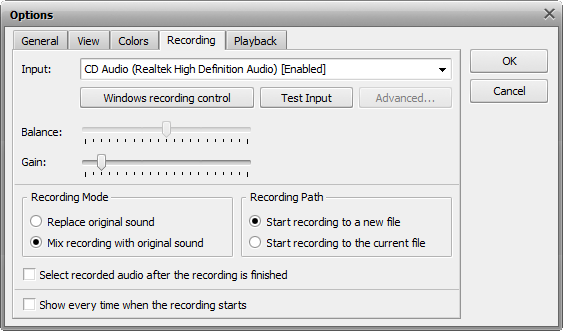
In the upper section of the window you can:
- select the device that will be used for sound recording and the input jack active on the device. Press the drop-down combo-box and select the necessary device from the list, if you have more than one input device installed on your computer;
 Note
Note: if you use Windows Vista or Windows 7, you'll be able to select both the device and the input jack in one and the same
Input field (the device name and its status being indicated in brackets). If you run Windows XP, the input device will be displayed in the
Device field and the list of avaiable input jacks will be displayed in the area below.
To view and adjust the input device properties use the Windows recording control button.
Note: if you run Windows Vista or Windows 7, you will be able to enable or disable the selected device clicking the
Windows recording control button. In the opened
Sounds window right-click the necessary device and select the corresponding option from the menu.
set the device Balance - the difference of the sound volume between the right and the left channels;
set the input device Gain - the loudness of the device input;
test the device pressing the Test Input button to make sure that the device is in working order and the Balance and Gain are set correctly.
In the Recording Mode section you can select between two available options:
- Replace original sound - use it to replace any of the audio signal present in the audio file with the recorded audio.
- Mix recording with the original sound - use it to mix your recording with the audio signal that's already present in the file.
In the Recording Path section you can select between two available options:
- Start recording to a new file - use it to start the recording to a new file. A new file will be created each time you press the Record button.
- Start recording to the current file - use it to record various recording sessions to one and the same file. No new file will be created when you press the Record button to resume the recording, the recordng will continue to the current file.
Finally, tick/untick the Select recorded audio after the recording is finished and Show every time when the recording starts options to enable/disable the corresponding features.
After you select all the settings for your input device you can click the OK button to accept the changes made and go on recording the sound from the selected and configured device.